
English 


Author: Site Editor Publish Time: 2026-08-17 Origin: Site


An intraoral camera is one of the most valuable tools in modern dentistry, but its effectiveness depends on more than image quality alone. To improve diagnosis, patient communication, and clinical documentation, the camera must connect reliably to a monitor or computer. A stable intraoral camera monitor system allows dentists to display high-resolution images instantly, helping patients better understand their oral health while supporting efficient clinical workflows.
Whether you're installing a new system or upgrading an existing operatory, understanding the available connection methods and setup process can help you achieve consistent performance with minimal technical issues.
Displaying intraoral images on a larger screen benefits both dental professionals and patients.
For dentists, a monitor provides a clearer view of small details such as early caries, cracks, worn restorations, or inflamed gingival tissue. Enlarged images support more accurate diagnosis and simplify treatment planning.
For patients, seeing their own oral condition in real time makes dental problems easier to understand. Instead of relying solely on verbal explanations, they can clearly visualize areas requiring treatment, which often improves communication and increases treatment acceptance.
In addition, images displayed on a monitor can be captured, stored, and shared with specialists or dental laboratories when integrated with digital imaging software.
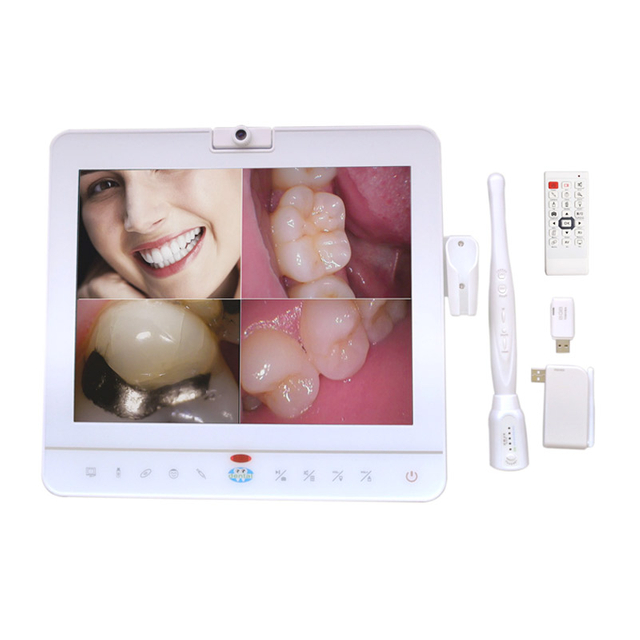
The best connection method depends on your clinic's workflow and equipment.
The most common solution is connecting the intraoral camera directly to a computer using a USB cable. The computer then sends the image to a monitor through HDMI or DisplayPort.
This configuration offers several advantages:
Easy image storage
Integration with dental software
Electronic patient records
Image annotation and comparison
Insurance documentation
Because of its flexibility, USB-based systems remain the preferred choice for most dental clinics.
Some cameras support direct HDMI output, allowing the camera to connect directly to a monitor without a computer.
This setup provides:
Instant live image display
Minimal video delay
Simple installation
Fewer software requirements
A direct HDMI connection works well for practices that primarily use the camera for chairside patient education rather than digital image management.
Many modern dental units include a built-in intraoral camera monitor system that combines imaging devices, monitors, and patient management controls into one platform.
These systems provide a clean workspace with fewer cables while allowing operators to control images directly from the dental chair. Although they require a higher initial investment, they improve efficiency in busy practices and hospitals.
Before making any connections, verify that all hardware is compatible.
You'll typically need:
An intraoral camera
Computer (if using USB)
Monitor or dental display
USB or HDMI cable
Camera driver or imaging software
Stable power supply
If using a computer, ensure it has an available USB 3.0 port. Faster data transfer improves image quality and reduces lag during live examinations.
Also confirm that your monitor supports the required video input, such as HDMI, DisplayPort, or VGA.
The installation process varies slightly depending on your camera model.
For a USB camera:
Connect the camera to the computer using the supplied USB cable.
Allow the operating system to recognize the device.
Install the manufacturer's driver if prompted.
Launch the camera software to verify that the live image appears correctly.
For HDMI models:
Connect the camera directly to the monitor.
Select the correct HDMI input on the display.
Power on the camera.
Confirm that the live image is displayed.
If no image appears, double-check cable connections, monitor input settings, and camera power.
Most USB systems require dedicated imaging software to manage captured images.
The software typically allows users to:
Capture still images
Record videos
Organize patient records
Compare before-and-after treatment photos
Export images for referrals or insurance claims
Many manufacturers also provide TWAIN-compatible drivers, enabling the camera to work with popular dental practice management software.
Before purchasing an intraoral camera, verify that it supports the software currently used in your clinic.
Proper monitor setup improves both diagnostic accuracy and patient communication.
Position the monitor where both the dentist and patient can comfortably view the images during treatment discussions.
Adjust:
Brightness
Contrast
Resolution
Color settings
A Full HD display is generally sufficient for routine dental imaging, while IPS monitors offer wider viewing angles and more consistent color reproduction.
After installation, perform a complete system test before using it with patients.
Check that:
The camera powers on correctly.
Live images appear without delay.
Image quality is sharp and properly illuminated.
The capture button saves images successfully.
Patient records receive the captured images correctly.
The monitor displays colors accurately.
Testing the entire workflow helps identify software or hardware issues before they interrupt patient appointments.
Even properly installed systems may occasionally experience technical issues.
No image displayed
Verify that the monitor is using the correct input source and confirm that all cables are securely connected.
Camera not recognized
Reconnect the USB cable, restart the computer, or reinstall the camera driver if necessary.
Poor image quality
Clean the camera lens, increase LED brightness if available, and check that the monitor resolution matches the camera output.
Images cannot be saved
Ensure the imaging software is running correctly and verify that the camera is fully integrated with your patient management system.
Regular software updates also help maintain compatibility with newer operating systems.
Once your system is installed, following a few simple practices can improve long-term reliability.
Always protect the camera with disposable sleeves or sterilizable accessories according to your infection control protocol. Clean the lens carefully after each procedure to maintain image clarity.
Avoid sharply bending USB or HDMI cables, as damaged cables are one of the most common causes of connection failures.
Periodically update camera drivers and imaging software to ensure stable performance and compatibility with your clinic's computer systems.
Finally, provide basic training for all clinical staff so they can capture consistent, high-quality images and troubleshoot simple connection issues independently.
Connecting an intraoral camera to a monitor is a straightforward process when the right hardware and software are used together. Whether your practice relies on a computer-based setup or a dedicated intraoral camera monitor system, proper installation ensures smooth image transmission, efficient documentation, and more effective patient communication.
By selecting compatible equipment, configuring the system correctly, and maintaining it regularly, dental professionals can fully utilize intraoral imaging technology to improve diagnosis, streamline clinical workflows, and enhance the overall patient experience.
Q: Can I connect an intraoral camera directly to a monitor without a PC?
A: Yes, using specific VGA/HDMI intraoral cameras or base stations, though you lose the ability to save images to a digital patient chart.
Q: Why is my intraoral camera button not saving pictures to DEXIS/Eaglesoft?
A: The camera requires a background capture utility (software bridge) running in the system tray to translate the button press into a command your imaging software understands.
Q: Are intraoral cameras compatible with Mac computers?
A: Most dental imaging software and camera drivers are built for Windows. Mac users typically need to run Parallels/Bootcamp or use specific cloud-based dental software with Mac-compatible TWAIN drivers.
Q: What is the best monitor size for a dental operatory?
A: A 22-inch monitor is the industry standard, offering a balance between clear patient visibility and operatory space constraints.
Q: Why does my intraoral camera image look blurry on the monitor?
A: Blur is typically caused by a dirty lens, failure to use the camera's macro-focus feature, or a lack of a physical fulcrum (hand stability) during capture.
Q: Do I need a medical-grade monitor for an intraoral camera?
A: While standard monitors work, medical-grade monitors (CE 93/42) with IPS panels ensure color accuracy and brightness consistency, which are critical for diagnostic integrity and patient presentation.


