
English 


An intraoral camera is a valuable tool that helps dentists capture high-quality images of teeth, gums, and other oral structures. While the technology is simple to operate, using it correctly can significantly improve diagnostic accuracy, patient communication, treatment planning, and clinical documentation. Whether you're working in a dental clinic, hospital, or teaching institution, following a standardized workflow ensures you get clear images and maximize the benefits of your investment.
This guide explains how to use an intraoral camera effectively—from preparing the equipment to capturing diagnostic images and managing patient records.
Before learning the operating steps, it's important to understand why an intraoral camera has become a standard piece of equipment in modern dentistry.
Unlike a traditional dental mirror, an intraoral camera provides magnified, high-resolution images that can be displayed instantly on a monitor. This allows dentists to identify small cracks, early caries, plaque accumulation, worn restorations, and soft tissue abnormalities more easily.
Patients also benefit because they can see exactly what the dentist sees. Real-time images make treatment recommendations easier to understand, helping build trust and improve treatment acceptance.
When integrated into digital workflows, an intraoral camera also creates accurate visual records for insurance claims, specialist referrals, and long-term case documentation.
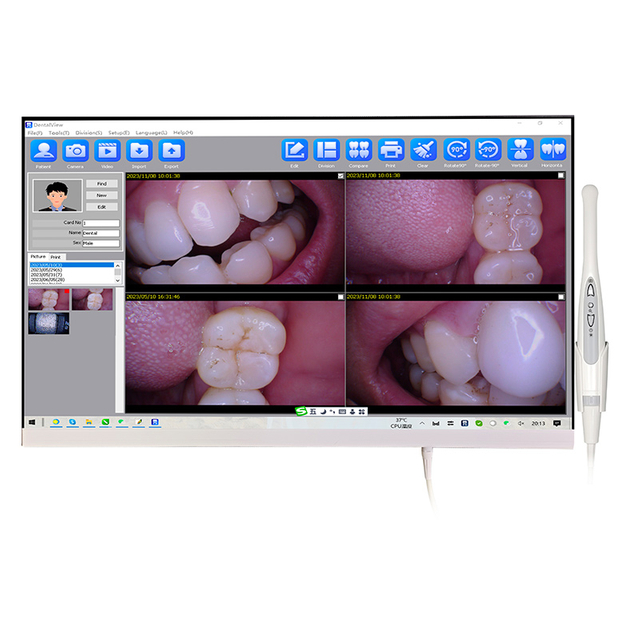
Before examining a patient, ensure the camera is properly connected and functioning.
If your practice uses an intraoral camera monitor system, verify that both the camera and monitor are powered on and displaying a live image. For computer-based systems, confirm that the imaging software recognizes the camera before beginning the examination.
Check the following:
Camera connection
Power supply
LED illumination
Image clarity
Capture button functionality
Software connectivity
Running a quick equipment check before each appointment helps avoid interruptions during patient care.
Like all dental instruments, intraoral cameras require proper infection control procedures.
Before inserting the camera into the patient's mouth, cover the handpiece with a disposable protective sleeve or install a sterilized autoclavable tip if your model supports one.
After each examination:
Remove and discard the protective barrier.
Clean the handpiece using approved disinfectants.
Avoid scratching the camera lens.
Store the camera in a clean, dry location.
Proper cleaning not only protects patients but also helps maintain image quality and extends the life of the equipment.
Patient positioning plays an important role in obtaining clear images.
Adjust the dental chair so the patient's head is well supported and the treatment area is easily accessible. Position the monitor where both the dentist and patient can comfortably view the images throughout the examination.
Good lighting and proper patient positioning reduce operator fatigue while making image capture faster and more efficient.
When using an intraoral camera, move the handpiece slowly and steadily throughout the mouth.
Avoid sudden movements that may cause blurry images. Resting a finger on an adjacent tooth can improve stability, especially when photographing posterior teeth.
Capture multiple views of each area whenever necessary, including:
Occlusal surfaces
Buccal surfaces
Lingual surfaces
Gingival margins
Existing restorations
Areas of concern
Taking several images from different angles provides a more complete clinical record and supports accurate diagnosis.
One of the greatest advantages of an intraoral camera is its ability to improve communication.
Using an intraoral camera monitor system, dentists can immediately display enlarged images on a chairside monitor. Instead of simply describing a cavity or cracked filling, clinicians can point directly to the affected area while explaining the recommended treatment.
This visual approach helps patients understand:
Tooth decay
Gum inflammation
Fractured restorations
Plaque accumulation
Tooth wear
Cosmetic concerns
Patients who clearly understand their oral condition are often more confident in treatment decisions and more engaged in maintaining their oral health.
After capturing images, they should be stored in the patient's digital chart for future reference.
Many practices choose an intraoral camera with TWAIN driver compatibility because it integrates smoothly with popular dental imaging and practice management software. TWAIN support allows images to be transferred directly into electronic patient records without additional conversion or manual file handling.
Digital records provide several advantages:
Easy treatment comparisons
Better communication with specialists
Insurance documentation
Long-term case tracking
Improved workflow efficiency
For practices using digital dentistry, software compatibility is just as important as image quality.
Rather than ending the examination immediately after capturing images, take a few minutes to review the results with the patient.
Show the photographs on the monitor and explain each finding using simple language instead of technical dental terminology.
For example, instead of saying "occlusal caries," explain that the dark area shown on the tooth represents early decay that should be treated before it becomes larger.
This collaborative approach helps patients participate in treatment planning and often increases acceptance of recommended procedures.
Even experienced clinicians can reduce image quality by overlooking a few basic techniques.
Some common mistakes include:
Moving the camera too quickly
Failing to dry the tooth surface before imaging
Allowing saliva to cover the lens
Capturing only one angle of the affected tooth
Using outdated software or drivers
Forgetting to save images after capture
Establishing standardized imaging protocols helps maintain consistent image quality across all providers in the practice.
To get the most from your intraoral camera, consider these best practices:
Clean the lens regularly to maintain image clarity.
Update camera drivers and imaging software periodically.
Train all clinical staff using the same imaging protocol.
Capture baseline photographs for every new patient.
Record before-and-after images for restorative, cosmetic, and orthodontic treatments.
Regularly test your intraoral camera monitor system to ensure reliable performance.
These simple habits improve workflow efficiency while creating more comprehensive patient records.
Learning how to use an intraoral camera effectively involves more than simply taking photographs. Proper setup, standardized image capture, reliable software integration, and clear patient communication all contribute to better clinical outcomes and a more efficient workflow.
Whether you're using a standalone imaging device or a complete intraoral camera monitor system, following consistent operating procedures ensures every image supports diagnosis, treatment planning, and patient education. Choosing an intraoral camera with TWAIN driver compatibility further streamlines digital record management, making it easier to store, retrieve, and share images across your practice. By combining good technique with reliable technology, dental professionals can deliver more accurate diagnoses, strengthen patient trust, and enhance the overall quality of care.
Q: Do I need specific software to use an intraoral camera?
A: Yes, you need imaging software to capture and store the photos. Most cameras use a TWAIN driver, which allows them to integrate seamlessly with standard practice management and imaging software like Dexis, Eaglesoft, or Schick, preventing the need for standalone applications.
Q: How do I stop my intraoral camera lens from fogging up?
A: Prevent fogging by managing moisture effectively. Use a saliva ejector to keep the mouth dry and an air syringe to clear condensation from the target area. Additionally, keeping the camera wand slightly warm before insertion can reduce temperature differentials that cause fogging.
Q: What is the difference between an intraoral camera and dental X-rays?
A: Dental X-rays capture internal structures like bone levels and interproximal decay between teeth. An intraoral camera captures high-definition, full-color images of the external tissue, highlighting surface issues like micro-fractures, failing margins, and soft tissue lesions that X-rays cannot see.
Q: How do you clean and sterilize an intraoral camera?
A: Always use a disposable plastic barrier sleeve during use. After the procedure, remove the sleeve and wipe the wand down with manufacturer-approved disinfectant wipes. Ensure your device has an IP67 waterproof rating to withstand thorough surface cleaning without damaging the electronics.
Q: Can intraoral camera images be used for dental insurance claims?
A: Absolutely. High-resolution digital images serve as indisputable visual evidence for insurance providers. Submitting clear photos of fractured teeth or failing restorations alongside traditional X-rays significantly reduces claim denials and expedites the approval process.
Q: What does a TWAIN driver do for dental cameras?
A: A TWAIN driver is a universal software protocol that allows your camera hardware to communicate directly with your dental imaging software. It ensures that when you press the capture button, the image is instantly saved into the patient's digital chart without manual file transfers.
Q: How does Light-Induced Fluorescence (LIF) work in intraoral cameras?
A: LIF technology uses specific wavelengths of light to illuminate the teeth. Healthy tooth structure reflects light differently than infected dentin or plaque. This allows the camera to visually differentiate between healthy tissue, active caries, and calculus deposits, aiding in early and accurate diagnosis.


